Feeds:
Posts
Comments

Considering my last post was on April Fool’s Day last year (and rightly so!), I don’t make promises when it comes to blogging, but I will try my best, which is why I am posting on April Fool’s Day once again. Although I am terrible at updating my blog (proof: I actually typed the majority of this post back in January when the look back was more relevant…), I do update my Instagram quite often, especially with photos of trips to Disneyland and dishes I cook/bake. 😉

So much has happened since my last post. 2013 started out slow, but it ended up picking up enormous speed! Here are some highlights from the latter half of the year:

  • I had finished my MA degree in December 2012, but in May I walked in the commencement ceremony. It was hot, it was long, but it was worth it. I finally felt like I was finished with school!
MA Graduation Day

MA Graduation Day

  • May was also the month my parents started remodeling the kitchen, a process that took over the summer.
Kitchen - Before

Kitchen – Before

  • In June, I flew to WV with my dad for his father’s 93rd birthday. I was there for his 90th and I was so happy to be there once again with him on his special day.
  • In early July, most of my family from Chicago visited. Two of my cousins participated in the Irish Dancing Nationals Competition. It was great to see them and my aunt & uncle. I just really wished my other two cousins could have made the trip with them!
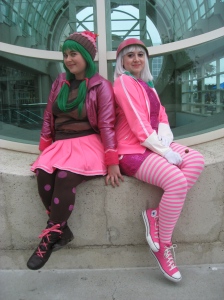
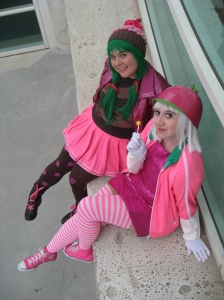
  • July also meant SDCC. This was definitely my busiest Comic Con yet—I barely slept! I even camped outside of Hall H the last night with friends. It was crazy, but it was fun. Will I do that again? Undecided, haha. Here are a couple pictures from the sometime-past-2am visit from Moffat and co., as well as a few pictures I took of my friends’ wonderful Sugar Rush cosplay!
Me, my brothers sweater, and Sue Vertue

Me, my brothers life-saving sweater, and Sue Vertue

A very good Ten with Steven Moffat

A very good Ten with Steven Moffat


IMG_2202

IMG_2200

IMG_2214


  • More family visited after Comic Con. This time TWO families, both from overseas and both from my dad’s side of the family (a reunion of cousins!). Only one of the families stayed with us though. Let me remind you: this was all happening during the kitchen remodel. Again, it was crazy, but fun.
  • At the end of August, I started working at a second job. So, during the day, I teach English at an ESL school, classroom style, and then most evenings I teach English or tutor with one-on-one lessons. This is what had been occupying most of my time for the last seven months.
  • August was also the month when we were finally able to move back into the kitchen, and I LOVE IT. I made good use of it over the holidays and then some! Seriously, my Instagram is flooded with pictures of food I’ve made. 😉
Kitchen - After

Kitchen – After

Kitchen - After, 2

Kitchen – After, #2

  • As for the rest of the year, I celebrated the holidays in the usual fashion with family and friends and enjoyed catching up on sleep and rest during the two week break I got from work from Christmas to New Years.
Thor and Loki - First Christmas

Thor and Loki – First Christmas

  • Now, 2014 has been filled with a lot of work and a lot of baking so far. Looking forward to seeing what else it holds!

And that, in short, is what I have been up to. I don’t have any plans for 2014. I hope to go on a cruise in June and I plan on going to Comic Con again in July. My brother quit is job and is traveling around the world for 6+ months, so I also hope to join him somewhere in the world at some point. Other than these hopes, I have no plans. I’ll just let what happens happen. I hope 2014 brings good things to us all! 🙂

Yours smiling, 

Miss Mo.

P.S. My brother started blog to record all his travel adventures. You should check it out!  —>  http://boust12.wordpress.com/

Well it has been just over a year since my last entry. A lot of things happened that prevented me from writing—computer issues (had to take it in not once, but three times, before getting it replaced altogether), working on a thesis that turned in to exams (which I passed, so I now have an MA in Asian Studies!), life—so I have been contemplating since January how I wanted to bring my blog back to life.

I decided April Fool’s Day was the best route. If I keep up with regular updates, then that is great. If I don’t, then it is all just a joke.

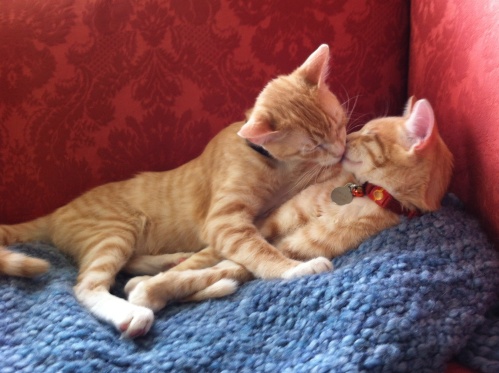
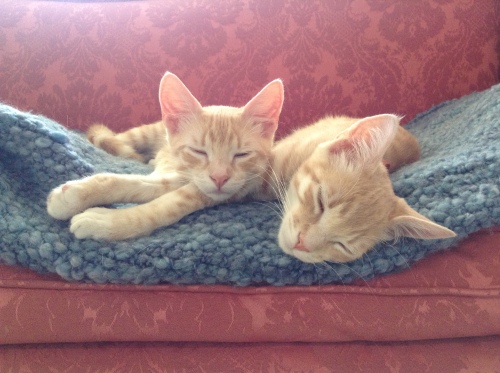
If I do manage to post more often, you will probably see photo’s my the newest members of my family, Thor & Loki:

IMG_9240

Brotherly Love

We were only going to adopt one kitten, but it would have been cruel to separate these adorable ginger brothers! I love them so much already.

IMG_4465

Nap Time, All the Time

I don’t really have anything else to say because I wasn’t even sure if I would post tonight (lol), so here are a few photo highlights from during my blogging absence:

IMG_9003

IMG_9014

IMG_9015

Solar Eclipse, May 20, 2012.

 IMG_0439

IMG_0443

IMG_0465

IMG_0088 2

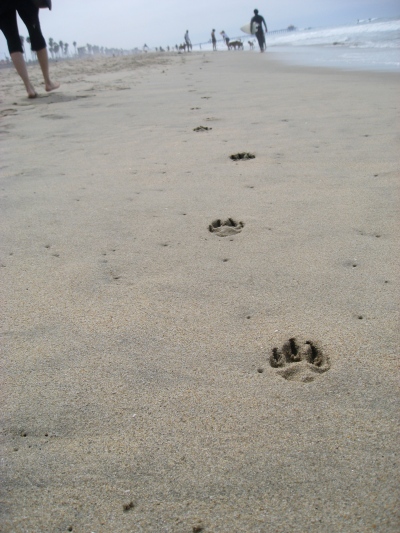
Took a walk along the beach with my mom and her friend. It happened to be during the US Open of Surfing in Huntington Beach. August 2, 2012.

 IMG_9658

IMG_9751

Doctor Who Panel at Nerd HQ 2012

IMG_9756

I went to SD Comic Con & Nerd HQ. I especially enjoyed my experiences at Nerd HQ. I was able to ask the Doctor Who cast about Karen & the Babes, which resulted in them singing a bit of Queen’s “Bohemian Rhapsody. A shining moment in my life as a Whovian. 😉

IMG_3146

Here is a fortune I received in a cookie. I really do hope it comes true!

IMG_0801

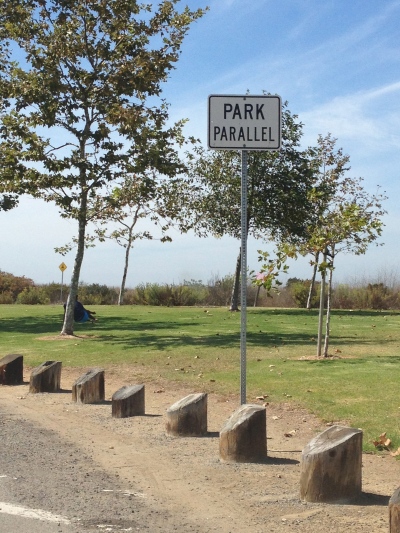
Curved & Parallel

…hmmmm…

Actually, you know what, this photo-sum-up is going to take too long. If I keep going, it won’t be the first by the time this gets posted, which will destroy my goal of this entry entirely… Go check out my Instagram. You can figure out what have been up to from there~: http://instagram.com/ms_random_mo

[Side note: I really need to invest in a better camera. Hopefully before SD Comic Con this summer… ^ ^]

This really did turn out to be a lazy post. I can only go up from here, right? Hopefully I will write again soon!

Yours smiling,

Miss Mo.

The past couple of weeks have been really busy, filled with research for both school and my Masters thesis, hanging out with friends, going to the movies with my family, and trying to get to the root of my back pain.

I’m not sure if I mentioned it before, but for a little over a year now I’ve had chronic pain in my lower back. Since months of physical therapy weren’t giving me the results my doctor wanted, he finally had me go in for an MRI. I had never had one before, but I was happy that they weren’t scanning my head because it was loud enough with my head sticking outside of the machine! All in all, it was an interesting experience. It really tested my ability to restrain myself from fidgeting or twitching. Every now and then I would feel a tingling in my toes or my fingers, which was followed with an inner chant of “Do not move. Do not move. Do not move!” One nice thing about the process was that the technician gave me a pair of headphones with what he called “top 40 songs” playing to listen to during the exam. It made me realize, however, how out of touch I am with the so-called top 40 songs. I’m just glad nothing super annoying played during the MRI..! ^_^

Having the MRI meant that I got to spend a majority of my spring break getting the results, having a procedure done, and recovering from the procedure. Woo.

The procedure was for diagnostic purposes, meaning it might not fix my pain, but my fingers are crossed! It basically involved getting six shots in my lower back. Everyone at the surgery center was really nice as well, so it was a good experience, which I really needed because I was screwed over once again earlier that morning when trying to buy a badge for Comic Con. The whole procedure took about an hour, but I can’t really be sure because I was under anesthesia.

Anesthesia is so disorienting. I was lying on my stomach, literally watching the anesthesiologist inject it, listening to him talk as he was doing it, when all of a sudden his voice was blurring or echoing–I can’t really describe it–and the next time I opened my eyes I was lying on my back in a different area with my pants half on and my shoes on my feet. After I woke up, I think I fell back asleep, but I’m not even be sure about it! There are so many other things I could say about the strange feelings that come from waking up from being under anesthesia, but instead I will just say this: it wasn’t as bad as when I had to be put under to get my wisdom teeth pulled out!

Although, the procedure was quick, it meant that I was basically on bed rest for the rest of the day. Unfortunately, that meant once I was fully awake it was dinner time and I wasn’t able fall asleep again until around 4am. This in turn meant that I slept most of the following day and stayed up late that night as well.

I hope to go to sleep a lot earlier tonight, aka right after I post this.


Before the procedure, the anesthesiologist told me a few things I wasn’t supposed to do for the rest of the day, half were serious and half were jokes: don’t drive, don’t cook, don’t shop online, and don’t do my taxes.

Since I wasn’t allowed to cook, I was glad that I had some French toast in the freezer!

Freezer French Toast is comfort food for me. My mom has been making it for my family for as long as I can remember. I asked her where she got the recipe once, and she thinks it was from a radio program.

Of course she’s adapted the recipe a bit over the years and I hope to play with it in the future myself. I feel like each time we make it together we discover new tricks to try or new ideas to make cooking it even easier than it already it. But as it stands, the recipe is a great, simple, comforting make-ahead dish.

First, you beat together the eggs, milk, sugar, and vanilla, using either a mixer or a Kitchen Aid stand. I like using the Kitchen Aid because I can slice the French loaf while the ingredients are mixing.

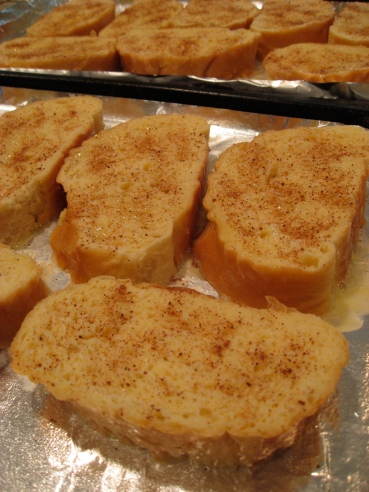
Once the bread slices are laid out onto the baking sheets (which are lined with foil and sprayed with oil), you ladle half of the egg mixture over the bread, sprinkle them with nutmeg, flip them over, ladle the rest of the egg mixture, and sprinkle with nutmeg again.

Then, you stick them in the freezer uncovered for about three hours, or until hard.

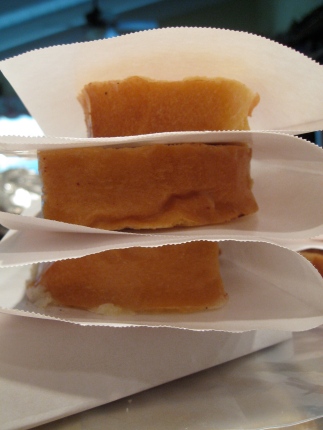
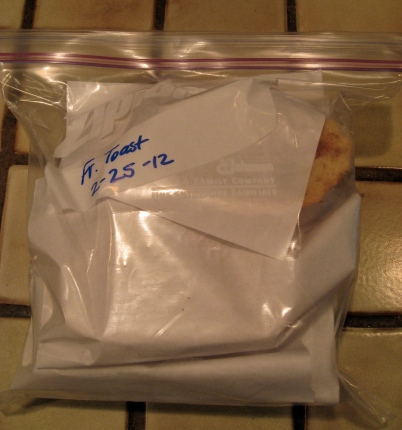
When the bread is hard, put them into Ziplock bags. I highly recommend wrapping each slice in freezer paper to prevent the slices from sticking to each other. And be sure to write the date on the bag, so you can keep track on how long it has been in the freezer!

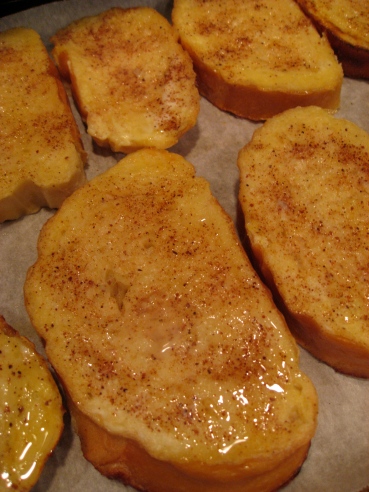
When you are ready to cook the French toast, just place the amount you want onto a baking sheet lined with parchment paper, brush the slices with melted butter, bake for 8 minutes at 450°F, flip the pieces of toast, brush with butter once again, and cook for another 8 minutes, or until they reach your desired color. Watch carefully so that you don’t burn the toast!

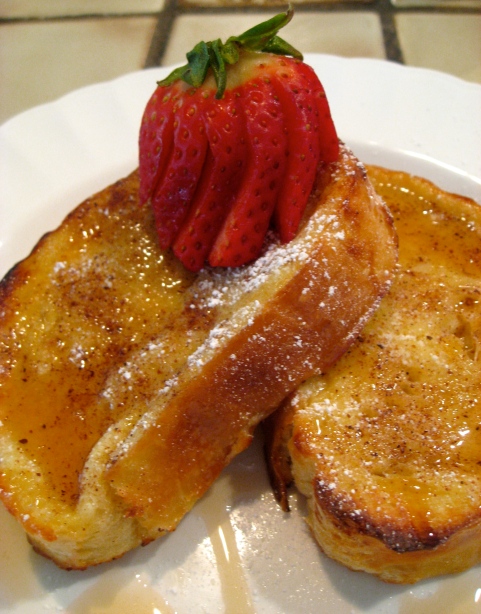
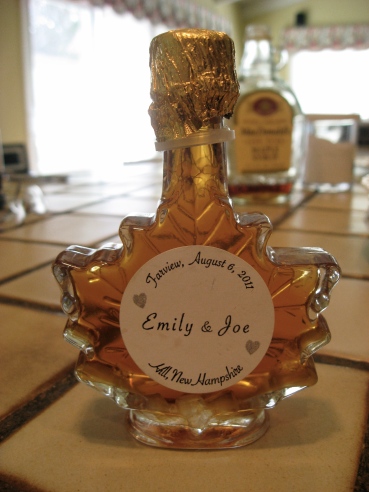
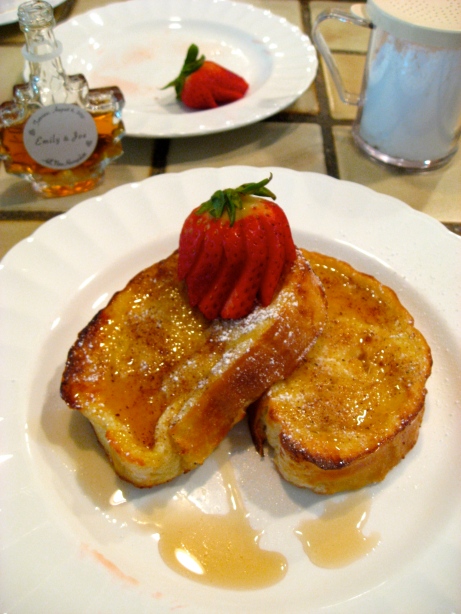
Serve with powdered sugar, syrup, and/or fruit—or all three! I had some strawberries on hand, so fanned a handful of them to make a simple but lovely presentation. The syrup I used was a souvenir from a family member’s wedding. Such a cute idea for a wedding guest gift!

So simple and so delicious. I really do love this recipe. Comfort food at its best in my opinion. And, since this week has turned into a week of rest and staying off my feet, I believe I will be making the rest of the batch of French toast my mom and I made together last month for breakfast this weekend.


Freezer French Toast

Ingredients:

8 eggs

2 cups of milk

1/4 cup of sugar

2 teaspoons of vanilla

1 lb. loaf French bread

ground nutmeg

1/4 cup of butter, melted at time of cooking

powdered sugar (optional)

syrup (optional)

fruit (optional)


Make-ahead preparation:

Cut the bread into slices that are about 1 inch thick. Divide the slices onto two cookie sheets lined with foil or freezer paper and spray with oil, such as Pam. Beat together the eggs, milk, sugar, and vanilla. Pour half of the egg mixture over the slices with a large ladle and let it soak into the bread. Sprinkle with nutmeg. Turn the slices over and repeat. Freeze on the sheets uncovered until firm, about 2 to 3 hours. Wrap the slices individually in freezer paper, or possibly wax paper, and places into Ziplock bags. Label the bags with the date and place it in the freezer.

To serve:

Preheat the over to 450°F. Place your desired number of frozen slices on a baking sheet lined with parchment paper. Brush each slice with melted butter. Bake for about 8 minutes. Flip the slices, brush with butter, and bake for an additional 6 to 8 minutes, or until nicely browned.

Optional: serve with powdered sugar, syrup, and/or pieces of fruit.


Yours smiling,

Miss Mo.

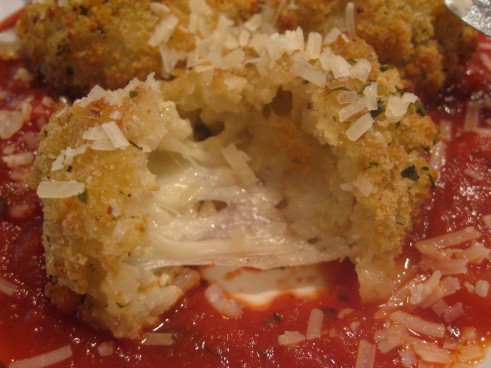
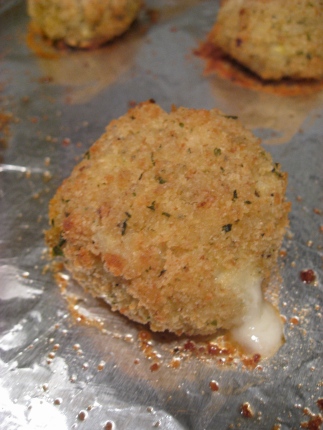
Finally, part three, la pièce de résistance (or the Italian equivalent of the phrase, whatever that might be~): baked arancini!

The reason I decided to make these for my mom was because I made her a coupon a few years back promising to make arancini for her. Time passed and she never brought it up, so I decided to go ahead and just make them—this gift acted as the fulfillment of a past promise as well as a delicious surprise! 🙂

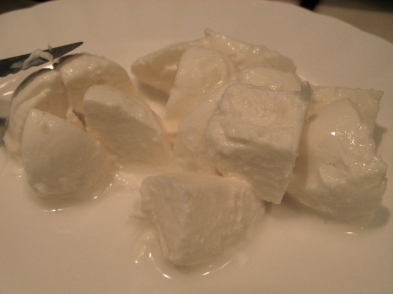
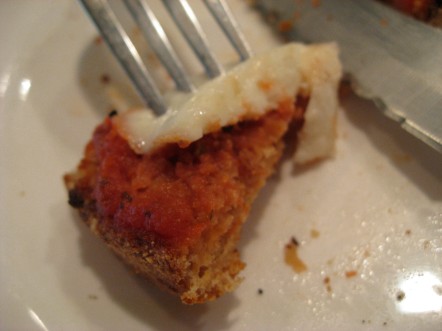
Going the baking route, I looked at various recipes I found for arancini on the internet, but I couldn’t find one that really excited me, so I winged it and created my own! Except for the mozzarella balls, I already had all the ingredients in my pantry, so it really was an easy and cheap dish to make. It made for a delicious lunch and could also make for a great dinner appetizer or party dish!

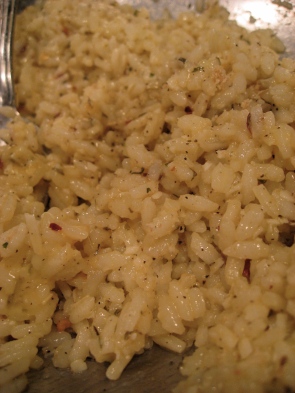
To begin, I made the rice the night before, so that it would have enough time to cool down. While many recipes I found online use leftover risotto as the rice portion of the dish, I didn’t have any leftover risotto on hand. Instead, I grabbed the first time of rice I found in the pantry, which happened to be Calrose, and used that. To add flavor to the rice, I melted some butter, added some dried parsley, and cooked the rice this combo for a few minutes. Then, I added some Better Than Bouillon (chicken flavor) to warm water instead of cooking the rice in just water. This adds a lot of flavor to the rice, so much so that I was tempted to just eat it right then and there! 😉

To the cold rice I added red pepper flakes, dried thyme, dried basil, beaten eggs, a couple small handfuls of grated parmigiano-reggiano I had grated a week earlier, salt, and black pepper. I’m sure fresh herbs would taste wonderful, but I didn’t have any at the time, so dried works wonderfully. I thought my rice mixture was a little too wet, so next time I might try two eggs first. Even though it I thought the mixture was very wet and a bit hard to handle, the end result was fantastic!

In a bowl, I poured in a good amount of Italian style bread crumbs. Then, on a plate, I cut the balls of mozzarella into smaller pieces.

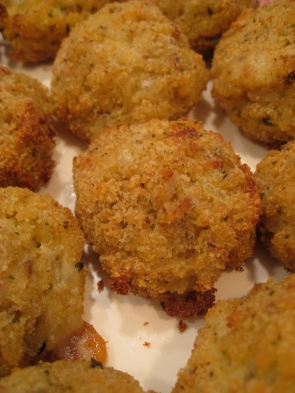
Assembling the balls is where it gets messy, but that’s the fun of cooking! 😀 I scooped some rice into my hand, flattened it, placed a piece of cheese on top, wrapped the rice around it, rolled the ball in  bread crumbs, and then set it on a baking sheet. Some rice will fall off into the bread crumbs. Just push them to the outer edges and keep on rolling!

Put them in the oven for twenty minutes and deliciousness comes out!

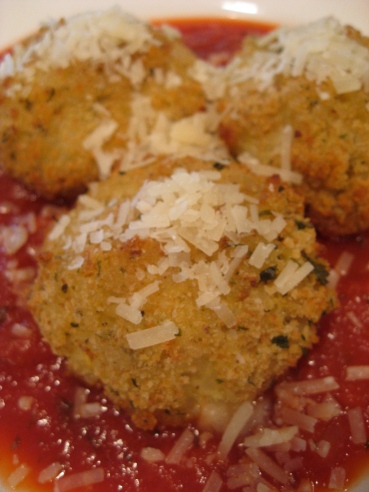
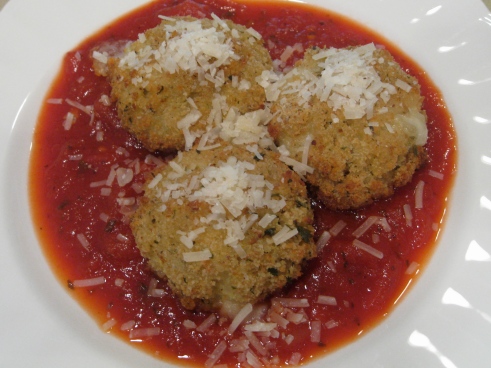
Serve with marinara sauce and top with extra parmigiano-reggiano, and then enjoy. 🙂

Out of this also came a bonus ‘recipe’:

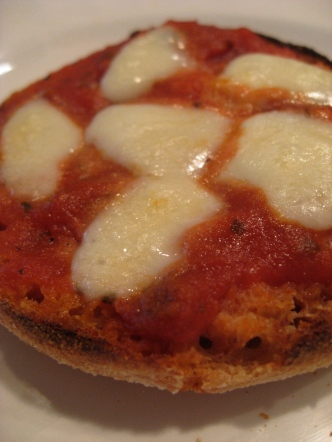
With leftover marinara sauce, a leftover mozzarella ball, and wheat English muffins that were in my refrigerator, I made a mini pizzas for lunch the next day!

Baked Arancini

Ingredients:

1 cup of uncooked rice

1 tablespoon of butter

2 teaspoons of dried parsley

2 teaspoons of Better Than Bouillon

2 cups of warm water

2-3 eggs, beaten

1 teaspoon red pepper flakes

1 teaspoon dried thyme

1 teaspoon or less of fine black pepper

1 teaspoon or less of Kosher salt

1-1.5 teaspoons of dried basil

Approximately 1/3 cup of freshly grated parmigiano-reggiano + extra for on top of the arancini after they are cooked

Italian style bread crumbs

Small balls of mozzarella

Marinara sauce of your choice

Cooking spay

Place a pot over medium heat and melt a tablespoon of butter. Add in the rice and dried parsley and cook for a few minutes while stirring occasionally. Add the Better Than Bouillon to the water and stir. (If you don’t have Better Than Bouillon, then use 2 cups of your choice of stock.) Pour into the pot of rice and stir. Bring to a boil, reduce to a simmer, and cover. Cook for 15 minutes and stir. Cook longer if there is still water in the pot. Set aside to cool.

Preheat the oven to 375°F. Cover 2 baking sheets with foil and spray with oil.

Once the rice is cooled, add the following ingredients to it and mix them all together: eggs, red pepper flakes, thyme, black pepper, salt, basil, and parmigiano-reggiano. Cut up the mozzarella on a plate. Pour bread crumbs into a bowl.

Place about 1 to 2 tablespoons of the rice mixture into your hand, flatten it over your fingers, placed a piece of cheese on top, wrapped the rice around around the mozzarella, rolled the ball in bread crumbs, and then set it on a baking sheet. Repeat until you run out of rice mixture. Line the balls on the baking sheets so that they are evenly spaced in a 3 by 4 alignment. There will be approximately 20 balls. Place them in the oven and cook for 20 minutes.

Pour some marinara sauce onto a plate, place the arrancini on it, and sprinkle with parmigiano-reggiano.

BONUS ‘recipe’: English Muffin Pizza

Place an open English muffin on a baking sheet, spray with oil, and toast in oven for a couple minutes. Spread on marinara sauce and place on slices of mozzarella. Cook in the oven until the cheese melts.

Enjoy!

Yours smiling,

Miss Mo.

I am surprised with myself: I am actually updating close to when I said I would be updating!

So now to continue with the cooking surprises for my mom…

I had originally planned to make lunch for my mom on her birthday, but I was able to convince my brother to spend his lunch break with us, and we took my mom out to lunch instead. Therefore, I surprised her with lunch the next day, giving her an extended birthday celebration , which made her feel very pampered!

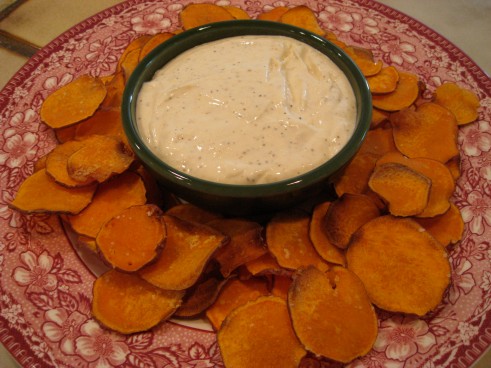
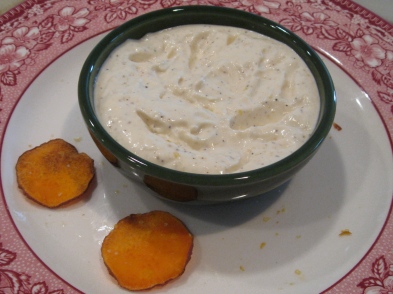
Since I knew lunch would take a while to make and that we happened to have a sweet potato or two in the pantry, I decided to make some baked sweet potato chips and what I call a cheater garlic aioli as an appetizer to accompany the main meal, baked arancini. I am all for making an aioli completely from scratch, but as this was meant to be something quick, so a cheater version works perfectly. ^ ^

To make the cooking process smooth and quick, I prepared the chips for the oven first and made the dip while the chips were in the oven.

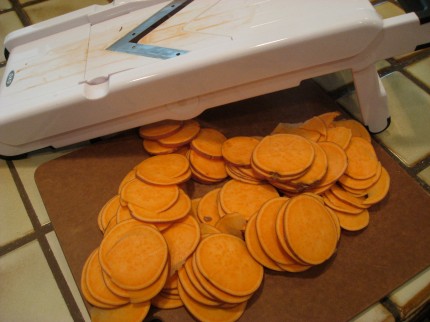
In order to make the chips, I highly recommend using a mandolin slicer. If you don’t have one, then I hope you have some super awesome knife skills!

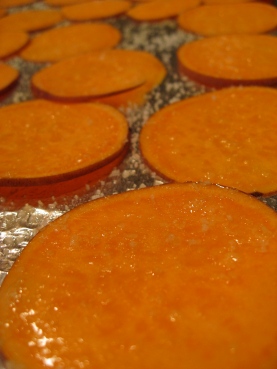
Once the sweet potato is sliced, line your baking sheets with foil (for an easier clean up!) and place the slices on it. I used two sheets so that each chip had it’s own space and that there wasn’t any overlapping. Then, spray them with vegetable oil, flip them, spray them again, and sprinkle them with salt. You don’t need to spray the foil before placing the slices on the sheet because there will be plenty on it from spraying both sides of the chips. For the salt, I used kosher salt, but I think sea salt would be very nice as well. As you can see in the picture below, I was a bit heavy handed with the salt. I blame the fact that once it touched the oil, I couldn’t see the salt anymore… ^ ^ Be careful when you sprinkle! lol

Then just pop them into an oven that is preheated to 375°F and assemble the dip!

The dip needs time to set and for the flavors to enhance, so I covered it and placed it in the refrigerator. But, don’t waste time when making it because the chips don’t take that long to cook! If you want to eat the chips right away, then I recommend making the dip first, so that it can hang out in the refrigerator longer. Since my mom was out at the time I started cooking and I wasn’t sure when she would be home, I didn’t see a problem with making it while the chips were in the oven. Warm or not, the chips were still delicious! 😉

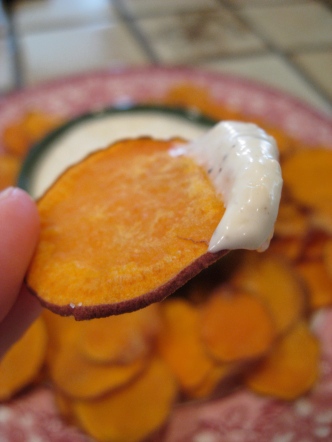
They are so delicious that they will be gone in no time! Seriously, the photo below was taken about 15 minutes after I took picture of the plate full of chips. They would have gone faster, but my mom had to hang up some clothes before they got wrinkled in the dryer–we just could not stop once we started! My mom have a fleeting thought of saving some chips for my dad, but it was fleeting and we finished them off in a flash! ^__^

There was plenty of dip left over for future chips! You can always make only half or even a third of the dip amount if you just want that perfect amount. But why skimp on something so delicious and the promise of deliciousness in the future?! 🙂


Sweet Potato Chips

Ingredients:

1 long sweet potato

Vegetable oil spray

Salt (Kosher, sea, etc. Your preference)


Recommended equipment:

Mandolin slicer


Preheat oven to 375°F. (I used Convection Bake, so the temperature may vary when using Bake.) Slice the sweet potato with the mandolin slicer and lay out the slices on baking sheets. Spray them with vegetable oil on each side and sprinkle lightly with salt. Bake for 10 to 20 minutes. After 10 minutes of cooking, take them out of the oven to flip them. Since some chips will bake faster than others, such as the small chips that come from the ends of the sweet potato, you will have to monitor them frequently from this point out. Just take out any that are getting dark brown areas so that they don’t burn and place them on a plate while allowing the rest to continue cooking until they reach your desired crispiness.


Quick Garlic Aioli

Ingredients:

3/4 cup mayonnaise (I used low fat!)

3 teaspoons of crushed garlic, or 3 cloves garlic (minced)

2 1/2 tablespoons lemon juice

1/2 teaspoon ground black pepper (or white pepper if you want a completely white dip!)

salt (to taste; maybe around 3/4 teaspoon)


Mix together the mayonnaise, 2/3 of the garlic, 2 tablespoons of the lemon juice, some salt, and pepper in a bowl. Taste and then add more garlic, salt, and lemon juice as needed. (I love garlic, so I used the full amount and maybe a little extra. It was VERY garlicky. ^ ^) Cover and refrigerate for at least 20 to 30 minutes before serving.


Here’s a teaser photo for part three, which should be up sometime next week! —>


Yours smiling,

Miss Mo.

It was my mom’s birthday last month, and I had no time to shop and no idea what to get her. So instead of buying some random gift in a rush, I decided to surprise her with a birthday breakfast in bed and a birthday lunch. I was really excited with the idea, planning what I would make her and when I could secretly prepare it.

My final plan of action was: banana & honey filled pancakes for breakfast, and baked sweet potato chips with a quick garlic aioli and baked arancini for lunch. I didn’t have to worry about dinner because she was going out with friends.

Since her birthday was on a day where I had to go to campus in the morning, I prepared the pancakes the night before, planning on reheating them in the oven when I woke up. Although I had planned on bringing them to her in bed, a pain in my lower back decided otherwise. Extra trips up and down the stairs were out of the questions! I just told her as I was going downstairs to come join me because I had a surprise for her. And boy was she surprised and ecstatic; she hadn’t been expecting it at all!

What made the breakfast extra special was that the Æbleskiver pan and the pancake mix I used were gifts from my mom to me. So, my gift to her was using what she gave me to make something for her. 🙂

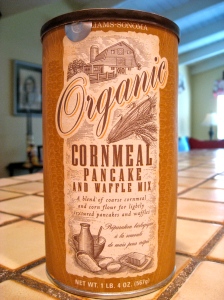
The pancake mix I used was William Sonoma’s Organic Cornmeal Pancake & Waffle Mix, but I’m not sure if they still make it. My mom gave it to me a while ago and I’ve been trying to make it last… ^ ^

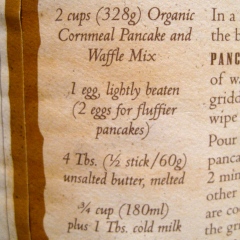
Aside from cutting the ingredients in half to make a small batch of pancakes, I followed the batter ingredients as listed on the container for the most part. One thing I changed was the amount of milk in the batter. I thought it looked too dry and that the pancakes would be too dense, so I added more milk, which is why there is an unspecified amount listed below. Of course, the pancakes were still dense in the long run because that is to be expected with cornmeal pancakes, but without the extra milk it would have been too much.

I had planned on using regular honey, but realized that we didn’t have any at home. In the end I was glad we didn’t because the Mango Sage Honey we did have was delicious and added a more unique flavor to the pancakes.


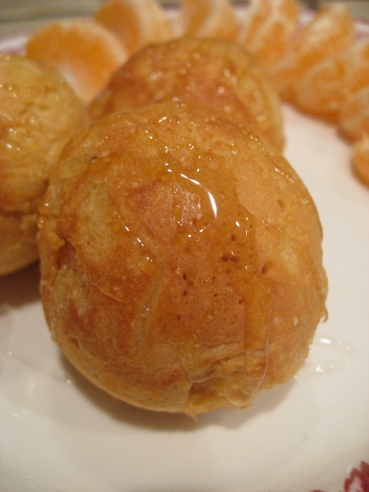
The end result was delicious!


Banana & Honey Filled Cornmeal Pancakes

For the pancake filling you need:

1 banana, sliced and then quarter the slices (I only needed 3/4ths of the banana)

Honey (I used Mango Sage Honey)


For the pancake batter you need:

1 egg, beaten

1 cup of cornmeal of pancake mix**

Milk***

2 tablespoons of unsalted butter, melted

Vegetable oil to coat the pan (or butter if you so prefer)


Toppings:

Honey

Powdered sugar

*This is half of the specified amounts listed on the container. It was only for my mom and I, so I only wanted a small number of pancakes. This made about 10.

**I am sure you can make your own batter from scratch instead of using a mix, but I had the mix in the pantry so I went ahead and used it!

***The instructions of the box called for approximately 3/8 cup when halved, but the batter seemed too dense and dry, so I poured in more as needed. It was most likely close to the original 3/4 cup that the full instructions called for.


In a larger bowl, mix together the batter ingredients.

Place your ebleskiver pan on the stove over medium heat and spray the wells of the pan with vegetable oil and wipe away the excess.

Cut the banana into slices and then quarter the slices. Mix the banana pieces with honey in a small bowl. There should be enough honey to coat the banana and pool around them.

Fill each of the wells with a about a tablespoon of the batter. Then, place the filling on top (about 3 pieces of banana with some of the extra honey surrounding them). Immediately after, put another tablespoon of batter on top. Be careful not to fill the wells all the way to the top, or else it might be too difficult to flip them. Once the bottoms are golden brown and crispy, flip the pancakes over using skewers or long toothpicks. (I find that by the time I’ve finished putting in the filling and second layer of batter the pancakes are ready to be flipped.) Cook the other side of the pancakes until golden and crispy, and then transfer them to a plate. Repeat with the remaining batter and filling. Drizzle with honey, sprinkle with powdered sugar, and then serve.

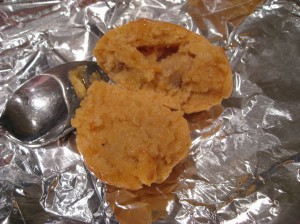
Since I made these the night before, I simply wrapped the pancakes in foil and reheated them in the oven at about 200°F convection bake the morning of my mom’s birthday. Since the pancakes were filled and therefore thick in the center, it took a while to reheat them. I’m sure they would taste better fresh, but reheated tasted was just fine to my mom and I.


This post is part one of three. Three recipes = three posts! I hope to have part two up sometime before Friday, but no promises! ^ ^


Yours smiling,

Miss Mo.

“Jeepers!”

I didn’t mean to have such a long time pass between my posts, but my laptop broke and it has been in repair for the majority of the month. I finally got it back last week, so I can finally post what I had been planning to post ages ago! Therefore, this entry will revisit the end of January and my quick trip to Florida. I don’t have much to say about February aside from cooking adventures because it has been largely uneventful. I’ll post my kitchen experiments in later posts. 🙂

Also, I ‘apologize’ for the onslaught of pictures in this post–I had such a hard time narrowing them down. Hopefully so many will make up for the fact that I could not write sooner~ 😉

To begin, the flights from California to Florida were probably the worst flight experiences I have ever had, not because of the airline, people, or noise, but because of my ears. Since I was still recovering from my cold, my head was congested. This meant that my ears were still clogged, and it sounded strange when I popped them. I thought it would be okay at first because I felt fine during the take off, but it wasn’t okay.  When the first flight landed in Texas, I felt a terrible pain in my ears, and when the second flight landed in Florida, I could hardly hear anything at all. Everything, including my own voice, was muffled, and it felt as though I was going deaf. I wanted to burst out crying in fear and panic, but stayed as calm as I could. By the next morning, I was able to hear in one ear, but not the other, so when my mom and I headed to the beach with my grandparents sometime after breakfast and experimenting with ear drops in their apartment, we stopped by Walgreens to buy the medicine I needed to clear the congestion in my ears. I never want to fly after a head cold again! Thank you God for drugs and my ability to hear! ^ ^

Aside from my hearing drama, I had a fabulous time with my grandparents, but the trip was far too short! I was thinking about it while on the plane and realized that it had been almost three years since I had last seen my grandparents, far too long of a time. My mom and I only had two full days to spend with them, so we made the most of them!

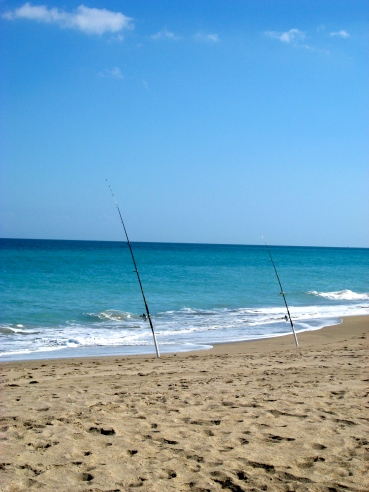
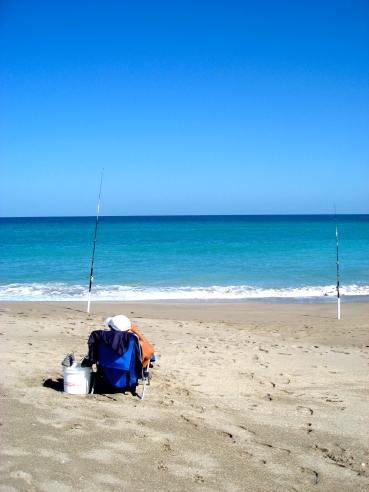
On the first day, after picking up the medicine, we drove to Stuart Beach. My grandpa and I walked along the beach while my mom sat with my grandma, who can’t walk on sand anymore because of an ankle injury she got a while back. While we were walking, my grandpa collected shells to share with my grandma since she can’t see them for herself anymore. So sweet!

Stuart Beach on January 18, 2012. The yellow and purple flags were out, indicating "Caution" and "Sea Pests."

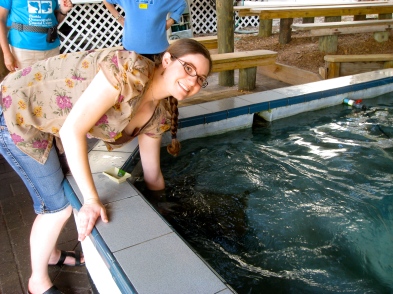
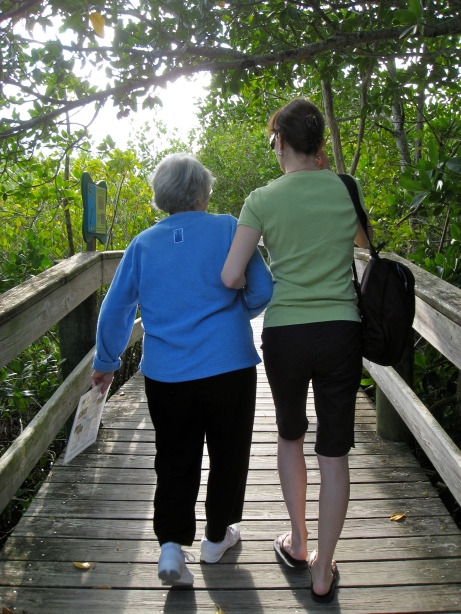
Afterwards, we went to Florida Oceanographic Coastal Center. It’s a great facility. We fed string rays, which was fun and one of the strangest feelings! The center also had a Game Fish Lagoon exhibit, where was watched the afternoon feeding. Then, we were lucky to catch one of the employees working with the sea turtles. She chatted with us about two of them, Hank and Turt, while feeding them and training them. The place also has nature trails in the surrounding land, so we walking along one of them before leaving.

Feeding Sting Rays. Ignore the crazy look in my eyes: it's the result of telling my mom to hurry up and take the photo, trying to resist looking back in the water, and Duane syndrome. ^ ^

Hank and Turt and the Race for Food

We spent the second day mostly relaxing. I say “mostly” because there was a bit of time spent helping my grandpa figure out who to set up their new internet service (only to realize there was a part that needed to be mailed to my grandparents) and looking for one of my grandma’s hearing aides (which was never found). The rest of the time my grandma showed me the antiques she’s collected over the years, telling me where and why she got them (and which ones she is planning to give to me one day! :D), while my grandpa shared some stories about the time he spent in the navy. It was all wonderful to hear learn. At night, my mom took us all out to dinner and used sneaky methods to pay the bill before my grandpa could. 😉

My mom got an iPad for Christmas that she brought with us to Florida. I then showed my grandparents how you could take photos on it. I don't think they understood seeing as I'm the only one looking at the camera...and I was taking the photo! lol

A memory my grandma wrote down to have put in the Community's weekly newsletter.

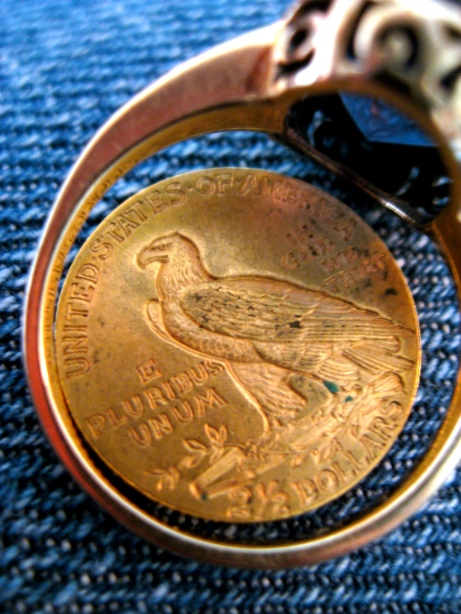
One of the coins from my grandparents' coin collection, of which I am envious!

When my grandparents moved into the retirement community, they brought with them some statues and hid a few on the property. This is one of them.

All in all, it was a wonderful trip and I really wish I could have stayed longer. Hopefully it won’t be too long before I have the chance to visit them again!


Well, I hope you enjoyed reading about and looking at pictures from my short trip to Florida. Be forewarned: my next few entries will most likely all be cooking oriented because that’s all I’ve really had time for in February outside of school.


Yours smiling,

Miss Mo.


P.S. The title comes from that fact that my grandma exclaimed “(Oh) Jeepers!” three to four times during my visit. I love her. 🙂

I am very surprised that I am writing on here today. I didn’t think I would be able to write an entry this week because I literally spent the past five days in bed. I haven’t even left the house since Monday night!

I kept wondering, “What can I write besides ‘I hate being sick.” Then, as my ability to think straight and to concentrate on one thing for an extended period of time started to return to me yesterday, I remembered that I did do something of note before this cold attacked me! And what will result is a little post about the past meeting the present…sort of.


Last weekend, a very good friend of mine from high school informed me that she was going to be in town for a few days with a friend of hers. We don’t get to see each other often anymore, so I eagerly cleared my Sunday in anticipation for her spending the day with her and her friend. We spent a couple hours catching up and reminiscing about things that happened in high school before heading over to a local park to watch the sunset. The view is great: the part of the park where we were is on top of a hill, so it overlooks the neighboring city and from certain areas, you can get a lovely view of the ocean in the distance as well. Here are a few of the pictures that I took:

Sunset

Moon Rising

After Sunset

The last of is by far my favorite. I love the colors of the sky, especially the blue gradient, how the sparse landscape accentuates the silhouette of the tree, and the singular star that was visible at the time.

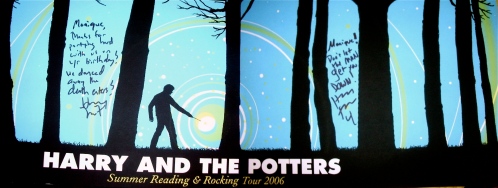
I also liked the picture because it reminded me of a Harry & the Potters poster I bought in 2006 when I saw the band perform at a local library on my birthday. (Who wouldn’t want to see Harry & the Potters, the band that started the music genre of Wizard Rock, perform at a library on his/her birthday?! I am so cool! 😀 lol)

Unfortunately, the poster is lost somewhere in my room, and I am still too sick to care to find it at the moment. Luckily, I was able to find some photos I took of it. However, they weren’t the best: the pictures were crooked; the lighting is different in each of them, so the colors don’t quite match; and I only focused on the parts of the poster where the brothers signed, so I am missing the top part of the poster (basically, the tops of the trees). But, despite these issues, I stitched the two photos together, and here is the result:

Harry & the Potters 2006 Summer Tour Poster

I probably could have done a better job, such as trying to make the colors match before stitching the two photos together, but I’m sick. Pretty good excuse if you ask me. 😉 Nevertheless, I am sure you can see why the poster reminded me of my picture at the park.


Well, that is all for this week. Not much, but it will do. I am sad I was unable to try a new recipe or two out this week, but I banished myself from the kitchen because I was either a) too miserable to cook and/or b) too afraid of contaminating everything I touch with my germs. No progress on the writing front either: as I mentioned before, my concentration was shot because of my cold. C’est la vie~~~

Although I am on my way back to 100% now, the chances of me updating next week are very slim because I am going to Florida with my mom to visit my grandparents.

Not sure when it will be, but…until next time!


Yours smiling (& sneezing & sniffling),

Miss Mo.

The first week of 2012 is officially ending in about an hour (it’s 10:45pm on Saturday, January 7th now, but it will probably be past midnight and technically the start of a new week by the time I post this). I haven’t really given too much thought into resolutions because I know I will have a hard time keeping them. I always do. ^ ^ But!, I have a pretty legitimate excuse, which is two-thirds the reason why I haven’t written on here in months: I am currently researching for and writing my thesis for my MA in Asian Studies. I knew it would be time consuming, but I don’t think I realized just how time consuming it would be until I had started! (The last third is because I was in Europe for 5 weeks without reliable computer access over the summer and then I was depressed because I had to have my cat of 16 years, Coco, put down the day after my birthday, which was about 5 days after returning home from Europe… R.I.P. <3)


While I am not stressing out over my thesis, there are a few resolutions I hope to keep up with & a few that might just be a dream. Here they are: 

  • Write more often (creatively)
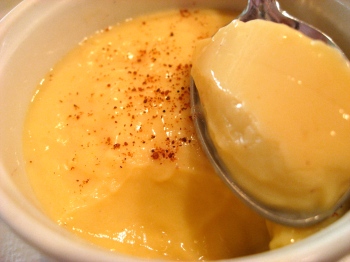
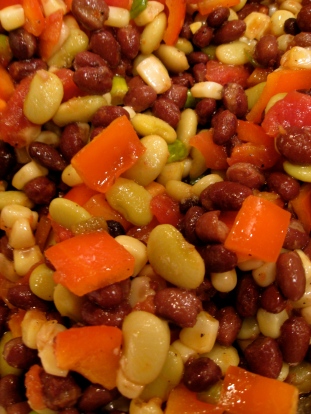
  • Cook more often (though sweets are on hold for a bit because apparently I made too many over the holidays, according to my mom). I am already doing good on this one—I have tried two new recipes this past week: eggnog pudding & a makeshift ‘Mexican’ bean salad based on what was in the refrigerator and pantry: 

Image

Eggnog Pudding

Image

Mexican Bean Salad

  • Write a blog entry a week, with the exception of being on vacation because internet access may not be guaranteed (e.g. when I go to Florida in 10 days)
  • Write a novel before my next birthday, which is about 6.5 months or so from now
  • Sing more often and maybe put some videos online, even if it’s only for family & friends
  • Figure out a way to (get money to) go to Japan to do some original research for my thesis
  • Live a healthier life (e.g. drink more water, eat smaller portions, exercise more often, etc.)

Yep. Not sure how those will go, but I will try my best!


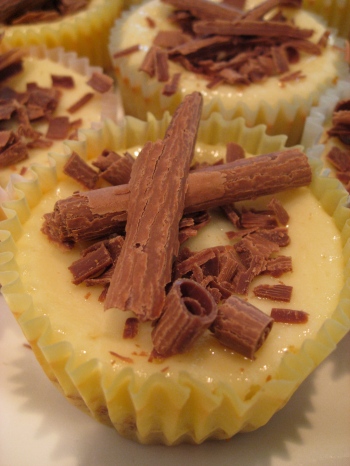
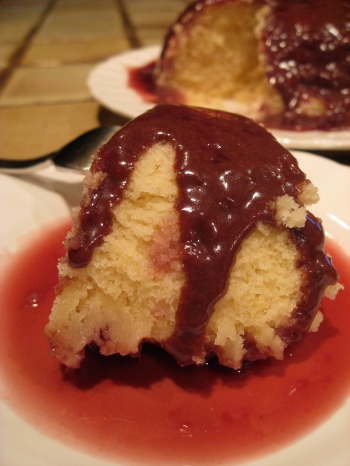
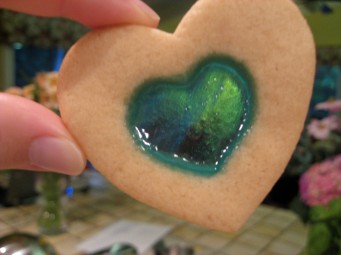
To end this week one post, here are some photos of some of the sweet things I cooked in 2011 (I tried picking pictures of the savory dishes as well, but the sweets pictures were nicer & concentrating on one helped the process of narrowing down the pictures~ lol) & a photo in memoriam of Coco: 

Image

Mini Cheesecakes with Peanut Butter Cup Center & Chocolate Shavings

Image

Microwaveable Orange-Scented Sponge Cake with Chocolate & Raspberry Sauces


Image

Stained Glass Window Cookies

Image

Mini Cranberry & Cream Cheese Pastries

Image

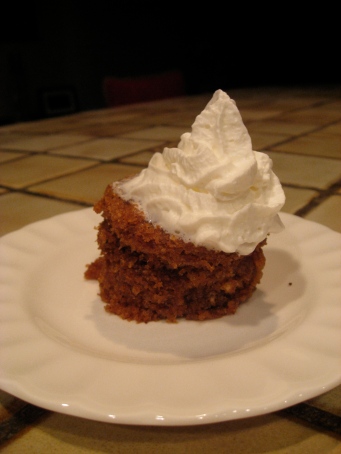
I tried quite a few Cake-In-A-Mug/Mug Cake variations in 2011. This one is a gingerbread cake.

Image

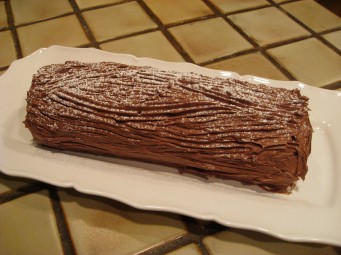
For Christmas, my mom taught me how to make Bûche de Noël.

Image

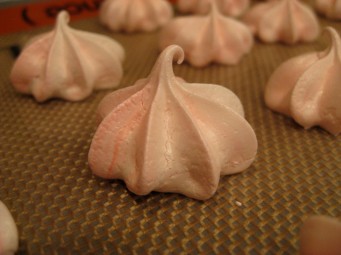
Peppermint Meringue Kisses with a Chocolate Surprise

And finally, 

Image

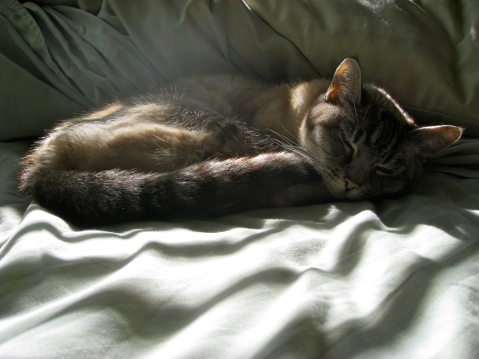
Coco, 1995 - 2011. I was so lucky to have you in my life. I miss you & love you & think of you all the time. R.I.P. ❤


Hopefully 2012 will be full of great new experiences & memories! 


Yours smiling, 

Miss Mo.


Image

Coco & I


First: Of Friends.

Recently, two very good friends of mine have celebrated their 25th, or quarter-of-a-century, birthdays.

Sometimes it feels like it wasn’t too long ago that I was passing the days in high school with them.  Now, we are working/in graduate school/still trying to figure things out.

When did the time pass by?

The most important thing, though, is that I am happy to have them in my life and glad to celebrate with them.

My friend Miss Elisa received some of the coolest presents at her party, such as this mug and pair of sunglasses:

Fancy Sunglasses & Mustache Mug

I really want a mustache mug now, but one for lefties. This one is a right-handed mug. How can I tell? If I tried to drink from it with my left hand, the mustache wouldn’t be facing outwards as it is supposed to. Where’s the fun in that?

For my friend Monika’s party, I arrived early in case she needed help setting up. This resulted in a determination to make a beautiful toothpick arrangement for the chocolate fountain. I was quite proud of the result, and told people so, which is probably why no one wanted to mess it up. Instead they just used their fingers. Oh well. ^ ^

Toothpick Arrangement

And then I moved onto organizing the cookies I brought…

Cookie Arrangement

It’s things like this that demonstrate my hostess prep skill as well as why I get so stressed before hosting an event of my own..! lol

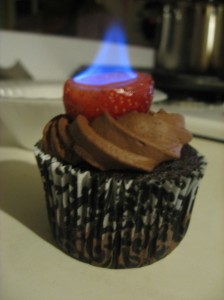
OH!, and my friend Kristina made flaming cupcakes for the party. I’ll have to try that sometime—I’ll add it to my mental “Recipes to Test” file.

Flaming Cupcake!

I made her promise to make Panda Bread with me sometime in the near future. When that happen, I will definitely post photos of the result! 😉

.

Second: Of Mothers.

Just sending out a “Happy Mother’s Day” message out there to all mothers, grandmothers, great-grandmothers, and mother figures.

I appreciate my mom for all that she has done for me and love her for it even more.

Thank you for everything. I love you. ♥

Me & My Mom, circa 2 years of age.

Yours smiling,

Miss Mo.